Posts
-
Let's Read the 4e Monster Manual 3: Demon, Nafelshnee
Copyright 2010 Wizards of the Coast This post is part of a series! Click here to see the others.
I remember seeing these things in 3e, and they probably date from earlier. My memory of them is not very detailed because I had no patience for reading page-long lists of spell-like abilities, which were the style of the time for epic demons.
The Lore
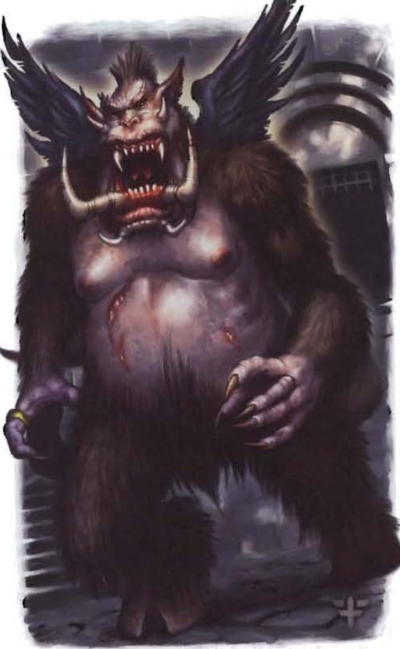
Nafelshnees are something of a rarity in the Abyss: demons with a civilization.
These demons hail from the 400th layer of the Abyss, known as the Woeful Escarand. In the distant past, this layer was ruled by a demon lord named Tantagaras, a corpulent beast who sired many lesser demons made in his image. These were known as his Waddling Legions.
Tantagaras took part in Tharizdun’s uprising against the gods, during which he entered a duel with Kord. Kord killed him, and the Waddling Legions brought his corpse back to the Woeful Escarand. They paid their respects by devouring the corpse, which causes fragments of Tantagaras’ essence to transfer to them and make them a lot smarter and more ambitious.
This of course resulted in a long and bloody demon civil war, which in turn ended when six of the most powerful nafelshnees got together and named themselves the rulers of the 400th layer. Known as the Lords of Woe, they carved the layer into a sprawling feudal realm, each of them sitting at the top of a large hierarchy of vassals that rule their own fiefs as they see fit.
Eventually, these lords and ladies exhausted all the resources of their abyssal layer, because demons might be able to build a society but they can’t make it sustainable. So now they make deals with “foreign” demon lords, offering their services in exchange for slaves, materials, food, and treasure.
Your typical nafelshnee divides people into three groups: “food”, “tools” and “masters”. The first group includes almost everyone weaker than themselves, from animals to humanoids to lesser demons. They never negotiate with food.
The second group includes those who aren’t tasty enough to eat, like insects, spiders, immortals, powerful elementals and, amusingly enough, gnomes. They’ll try to bully the weaker “tools” into servitude, and might try to manipulate the stronger ones, but I guess they might just try to kill them without eating if talks break down.
The last group is very small and consists of the mightiest demons, demon lords, and efreets. With these, their usually arrogant behavior melts into a wheedling servitude worthy of Starscream.
The Monsters
Nafelshnees are Huge Elemental Humanoids with the Demon tag, Darkvision, and a ground speed of 6. They can also fly with a speed of 4 (clumsy). They have very good Variable Resistance (20). We get two stat blocks for them.
Nafelshnee Swine Guard
Most nafelshnees fit this profile, and have a role roughly equivalent to that of a landless knight in their society. They serve more powerful lords and hire themselves out as mercenaries, and have actually managed to get a good reputation for being both resilient and obedient.
Swine Guards are Level 20 Brutes with 237 HP. They wield giant Reach 3 halberds that do solid physical damage and push the target 2 squares on a hit. If someone manages to get closer they can try to take a Noisome Bite out of the enemy, which does slightly less damage but inflicts ongoing 10 poison damage (swine guards never brush their teeth).
Their variable resistance can change twice per encounter, and when they’re first bloodied they immediately use a power called Shattered Minds. This is a Close Burst 3 that targets enemies’ Will. On a hit it does psychic damage and dazes (save ends). If the first save fails, the demon can slide the victim 3 squares, and the daze worsens to a stun!
This makes swine guards the kind of brute who wants the PCs to surround them and beat them up a bit. The halberd’s push rider means they can also herd the PCs towards other monsters as this happens.
Nafelshnee Tyrant
These are the lords and ladies of the Woeful Escarand. They’re powerful magicians with great knowledge of rituals and access to libraries of forbidden lore. They are willing to part with ritual scrolls and bits of relevant information in exchange for suitable tribute, which usually consists of food (the book mentions “a brace of plump halflings” as an example). In a fight, they like to fling destructive magic while sitting on their thrones, though they can move at standard nafelshnee speeds if forced to.
Tyrants are Level 23 Controllers with 215 HP. Their reach 3 claws slide the target 3 squares on a hit, and their basic ranged attack is a Black Lightning spell that does necrotic damage and makes the victim vulnerable 15 to psychic damage for a turn.
Their psychic attack is Unholy Whispers (recharge 5+), a fireball sized area burst that does psychic damage and dazes (save ends). A miss still does half damage.
As a minor action, they can curse enemies with a Vile Glare, a non-damaging attack that targets Will and makes it so the target is only able to use basic attacks (save ends). It recharges every time a target fails a save against the effect.
Final Impressions
I know I say this all the time, but I really love these more focused fiend stat blocks. Earlier editions just had long lists of spell-like abilities and memorized spells for each demon, so I tended to just skip over their descriptions.
Tyrants obviously pair really well with other monsters that can deal psychic damage. A simple but flavorful and effective encounter might be a pair of happily married nafelshnee tyrants and their swine guard retinue. Two tyrants means you can assemble the Black Lightning + Unholy Whispers combo much quicker.
-
Let's Read the 4e Monster Manual 3: Demon, Molydeus
Copyright 2010 Wizards of the Coast This post is part of a series! Click here to see the others.
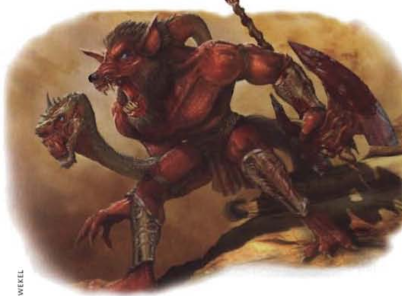
When Tharizdun first planted the cosmic Seed of Evil in the Elemental Chaos, he ordered his seven most powerful angels to stand guard over it. The angels’ oaths and sense of duty compelled them to obey. However, they all had some serious personal misgivings about this whole “corrupt and destroy the universe” business, so they were reluctant guardians.
When the seed inevitably corrupted them, it seized on this reluctance and turned the seven into two-headed Molydeus demons. They have a wolf’s head symbolizing their fierceness, and a snake’s head symbolizing their uncertain loyalty. They also carry the same axes they wielded as angels, which in a surprising twist contain a bit of the unspoiled light of creation. The demons are bound to their weapons - when one dies, the axe dissolves into sludge. If it’s stolen or lost, the molydeus will not rest until it has been recovered.
The seed of evil hasn’t needed guarding for a long time now, and the molydeus have scattered. They wander the Abyss alone, or followed by small retinues of other epic-level demons. They usually prefer Mariliths, but will also work with Balors or Klurichirs. Very rarely you’ll find one of them doing a demon lord’s dirty work, but these relationships rarely last long. I mean, if anyone is really at an “almost demon lord” level of power it’s the molydeus, so I guess they don’t like being the junior partner.
The Numbers
There’s only one stat block in this entry, which is okay because there are only seven molydeus demons in all the universe. They’re Large Elemental Humanoids with the Demon tag, and Level 29 Elite Soldiers with 544 HP. Stronger than balors and pit fiends, and on par with primordial colossi. They have Blindsight 5, a ground speed of 8, and are immune to fear.
Mechanically, molydeus share some similarities with Ettins, due to their two heads. They have All-Around Vision and therefore can’t be flanked; Double Actions allows them to roll Initiative twice and take two full turns per round; and Dual Brain allows them to automatically save against dazing, stunning or charm effects at the beginning of each of their turns.
Like all demons, the molydeus has Variable Resistance, and since it’s epic the trait is at its most powerful: 30 resistance to an element, switchable 3 times per encounter.
In a fight, it’ll probably open up with its Dread Word encounter power, a fear attack that targets Will in a Close Burst 5, affecting only enemies. A hit dazes them (save ends); a miss slows them and inflicts a -2 attack penalty (save ends both). If it needs to mark someone, it will attack with its Reach 2 axe, which is a pretty beefy attack already. Otherwise it will alternate between Wolf Bites and Snake Bites.
Wolf bites are Reach 2 do about as much damage as the axe and slide the target 6 squares to a square adjacent to the demon. Snake Bites are weaker, but have Reach 3, make the target grant combat advantage, and inflict 20 ongoing poison damage (save ends both). Both the axe and the bites count as basic attacks.
The wolf bite is an excellent positioning tool, so I guess the demon might use if a few times to set the party up for the Dread Word.
Final Impressions
Now here’s some proper epic demon lore! Mechanically, it has a suite of attacks that’s both thematic and varied, and indeed pairs well with mariliths and klurichirs. The klurichir stat block works better as a demon created to serve the molydeus than as a demon lord contender itself.
-
Let's Read the 4e Monster Manual 3: Demon, Maw
Copyright 2010 Wizards of the Coast This post is part of a series! Click here to see the others.
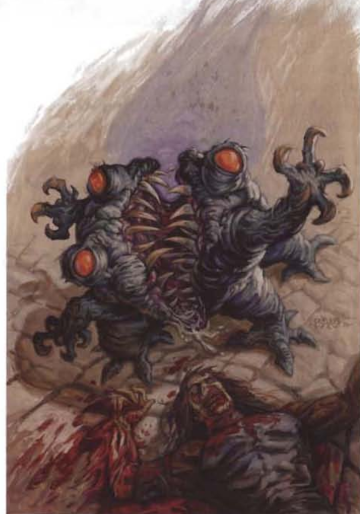
There isn’t much to a maw demon. It’s a huge fanged mouth with some extra bits attached so it can move to wherever the food is. While most other demons are motivated by rage, hatred, or ruinous ambition, these things just want to eat. They’re a bit like sharks, drawn to the smell of blood, and will prioritize an easy meal over a fight.
Maw demons are still demons, so they prefer their meals bloody and still twitching. If there are none already in that state, they’ll advance on the nearest living creature.
The typical maw demon is rather weak as far as demons go, though it still presents a big threat to non-combatants. Those who manage to live longer become much stronger and hungrier.
Maw demons are sapient, but just barely. They don’t really form alliances, but stronger demons can bully them into servitude, and even amateur demonologists might be able to summon and bind one.
Maw Demon
This is a Medium Elemental Humanoid with the Demon tag. It’s a Level 2 Brute with 42 HP, darkvision, and a speed of 6.
The demon’s snapping jaws act like an aura (1) that make all enemies inside grant combat advantage. Its basic attack is obviously a bite. It can use a move action to perform a Ravenous Advance and shift 5 squares to end adjacent to a bloodied enemy.
Finally, as a demon, it has Variable Resistance and can switch it once per encounter.
Greater Maw Demon
This is mostly just a leveled-up maw demon. It’s a Level 16 Brute with 187 HP and correspondingly bigger numbers. Its variable resistance works twice per encounter, and it has a new hability: Howling Hunger targets Will, hits a Close Burst 3, does thunder damage, and knocks targets prone. It can only be used when the demon is bloodied.
Final Impressions
Just another demonic brute. Its low level makes it an interesting variation on the MM2 dretches, with better math. Their most interesting power is actually the Snapping Jaws aura, which makes them pair really well with ranged monsters that benefit from combat advantage.
During the MM2 reading on the RPG.net forum, someone mentioned that these things could be abyssal xorns, and it fits really well with their mechanics.
-
Let's Read the 4e Monster Manual 3: A Note on Fiends
This post is part of a series! Click here to see the rest.
This post doesn’t correspond to an entry in the book, but I figured I’d write it to explain a few important differences in organization between the MM3 and its predecessors.
The first two Monster Manuals had huge multi-monster entries for the “Three Dees”: Demons, Devils, and Dragons. These entries included some general lore that applied to all of them, and a huge number of individual stat blocks with their own bits of lore. They were a real chore to cover!
Dragons are still like that, because we’re going to be looking at a whole new dragon sub-category here. But the fiends (demons and devils) are organized differently.
This is the third main monster book in the edition. Pretty much everything that needed to be said about general demon and devil lore has already been said in the previous books, and likely on a few extra supplements that came out alongside them. So the demons and devils in this book are all in their own individual entries labeled as “Demon, X” and “Devil, Y”. That’s going to make them much easier to cover!
There’s one demon we already covered in the past, the Babau, and for that one I’m just going to refer you to the original post I made a while back. I believe every other demon and devil here is new to the Let’s Read project, so I’ll cover one entry per post on them.
-
Let's Read the 4e Monster Manual 3: Demon, Klurichir
Copyright 2010 Wizards of the Coast This post is part of a series! Click here to see the others.
The Abyss is home to several powerful demon lords, each of whom has their own ruinous designs on the rest of the universe and is building an army to enact those designs. Yet these armies rarely seem to leave the Abyss to start their invasions. One of the reasons for this is that the demon lords hate each other as much as they hate everything else, and spend much of their time locked in eternal bloody warfare. Another one is that you have huge hordes of “unclaimed demons” who prefer to pursue their own personal goals instead of organizing into a large force.
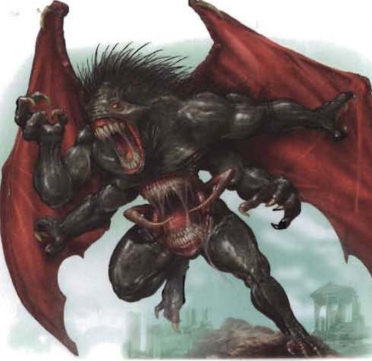
Well, it looks like the seed of cosmic evil at the bottom of the Abyss has had enough of this lack of focus, so it started producing a special brand of demon from pure elemental evil energy and sending them to the upper layers to clean house. These are the klurichirs.
Every klurichir is a contender for the rank of demon lord, and has a real shot at it given enough time. They differ from the existing demon lords in that they were never primordials, but were instead born as demons.
These demons are quick to take control of those unclaimed hordes, and use them to shake things up in the Abyss. They do this by throwing them against the forces of the incumbent demon lords as they fight each other. They surround themselves with other epic-tier officers like balors and nafelshnees, and spend the lives of their lesser underlings freely because there are always more where those came from.
The Numbers
We only get a single stat block for klurichirs. They’re Huge Elemental Humanoids with the Demon tag, and Level 28 Soldiers with 258 HP. They have Blindsight 5, and are immune to fear. Their ground speed is 8, and they fly at speed 12 with clumsy maneuverability, meaning they fight on the ground.
Klurichirs project a Malign Influence aura (2) that prevents enemies inside from regaining HP by any means. They fight with gigantic Reach 3 axes that do more damage when the demon is bloodied and mark for a turn. They can make occasional Savage Hew attacks (recharge 5+) that hit everyone in a Close Burst 3 for the same damage and effects.
When a marked enemy moves, the klurichir can try to grab then with its Reach 2 pincers a reaction. This does some initial damage on a hit, and from that point on the demon can spend minor actions to sustain the grab and deal the same amount of damage automatically. Only one victim can be grabbed at a time.
When the klurichir is first bloodied, it speaks a Blasphemous Utterance that deals necrotic damage and dazes (save ends) in a Close Blast 5.
Final Impressions
Huh, it turns out klurichirs are actually a bit weaker than Balors, who are Level 27 Elite Brutes. So I have a bit of a hard time believing the text that says they’re “on the cusp of becoming demon lords”.
Maybe that also applies to balors, and you can reskin klurichirs into “baby balors” wielding axes instead of the classic sword and whip combo. It’s also relatively easy to make klurichirs into elites via the usual rules.
Mechanically, I like the “no healz” aura and the pincers, which combine to put grabbed PCs in a very unfortunate situation. Damaging a grabbed PC is a minor action and the demon can still attack them with that high-damage axe.
subscribe via RSS